If you’ve worked with PET injection molding, you know temperature control isn’t just a detail—it’s the backbone of every good part. From clear food containers to preforms for water bottles, PET is a material that’s unforgiving if temperatures are off: too low, and you get short shots with streaks or un-melted resin; too high, and you deal with degradation, yellowing, or parts that shrink and warp as they cool. Over the 12 years I’ve run my PET injection molding machine supply business, I’ve talked to dozens of molder’s technicians and plant managers who chase temperature issues like they’re ghosts. Most of them don’t realize that controlling the machine’s temperature isn’t just about adjusting a dial on the control panel—it’s a system, and every piece has to work in sync. Today, I’m pulling back the curtain on how we train our own customers to nail this, no matter if you’re running a 10-year-old machine or a brand-new high-speed model off our production floor. PET Injection Molding Machine
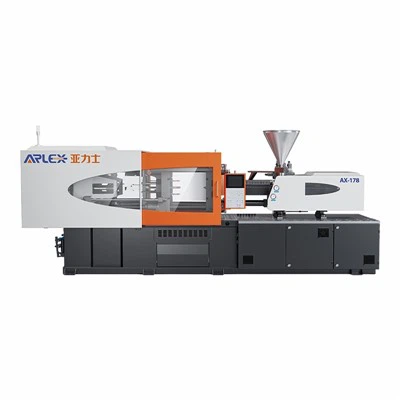
First, let’s break down why PET is so tricky to heat and cool. Unlike other plastics, PET has a very narrow processing window—its melting point is around 250°C (482°F), and it starts to degrade chemically at just 280°C (536°F). Degradation doesn’t just turn parts yellow; it creates acetaldehyde (AA), a chemical that can make food or beverage products taste off if you’re molding preforms or packaging. I had a customer last year who was running 500ml preforms for a craft soda brand, and their first production run had a hint of stale taste in the test bottles. We walked through their machine settings together, and turns out their barrel temperature was spiking 10°C above the target for 10 minutes every time they switched material loads. That tiny, temporary overheat was enough to kick off mild degradation, and fixing it cut their AA levels in half overnight. That’s the kind of small, specific mistake I see all the time, so let’s start with the most critical part: the barrel temperature profile.
Your barrel isn’t a single heating element—it’s split into zones, usually three to six, depending on the machine’s size. The feed zone (where the raw PET pellets drop in) should be set the lowest, usually around 220–230°C (428–446°F). That’s to gently soften the pellets so they don’t clump and jam the feed throat. If you set the feed zone too high, the pellets melt too fast before they reach the screw’s mixing section, which leads to inconsistent melt. The middle and transition zones are where the real melting happens—these should land right at PET’s melting point, 245–255°C (473–491°F). The nozzle zone, which is the last section before the mold, needs to be a tiny bit higher, like 255–260°C (491–500°F), to keep the melted resin fluid enough to flow through the nozzle and sprue without cooling and clogging. The big mistake here is setting all zones to the same temperature. A new customer of mine tried that six months ago, and their parts came out with half short shots because the feed zone was too hot and the nozzle was too cold—they couldn’t figure out why, and it took a quick call to our tech support team to fix it.
Next, screw speed and back pressure are tied directly to temperature control, and most people forget that the screw generates its own heat as it rotates. When the screw turns, friction between the molten resin and the barrel wall creates extra heat that isn’t showing up on your digital temperature gauge. If you crank up screw speed too high, that friction heat can push the barrel over that 280°C degradation threshold in a hurry. I recommend keeping screw speed between 60–100 RPM for PET, depending on your machine, and monitoring actual melt temperature (not just barrel zone temps) with a handheld pyrometer at least once per production shift. That’s the only way to know if your settings are working, because the digital gauges on the control panel only measure external barrel heat, not the actual temperature of the resin inside. Back pressure is another piece: setting back pressure to 100–150 bar (1450–2175 PSI) gives the resin enough time to mix evenly, which keeps melt temperature consistent across every shot. I had a molder in Ohio who was running thin-walled PET trays and noticed variations in wall thickness shot to shot; they dropped their back pressure from 180 bar to 120 bar, and their melt temperature became 5°C more consistent, eliminating the thickness variations.
Now, let’s talk about cooling temperature control—this is where most machines miss the mark, and it’s not just about turning on the water. PET parts cool quickly, but uneven cooling is the #1 cause of warping and shrinkage. The mold itself is split into two halves: core (the side that touches the inside of the part) and cavity (the outside), and both have their own cooling lines. If your core is too hot, the inside of the part cools slower than the outside, which causes stress in the material. That stress leads to warping when the part is ejected, or even cracking after it’s filled. For PET, we recommend keeping mold cavity temperature between 10–20°C (50–68°F) for most applications, and core temperature a little lower, around 8–15°C (46–59°F), to get even cooling. But here’s the thing: you can’t just set your chiller to a fixed temperature. If your plant’s ambient temperature jumps up in the summer (like it does in the Southeast, where a lot of our customers are based), the chilled water warms up before it reaches the mold lines, throwing off cooling. That’s why we equip every machine we sell with a variable-speed chiller control that adjusts water flow based on mold temperature sensors, instead of just cycling the chiller on and off. A customer in Texas told us last year that before upgrading to our chiller, their mold temperature would swing 5–7°F every afternoon when the warehouse got hot, and their reject rate was 8%. After switching, that swing was cut to less than 1°F, and their reject rate dropped to under 2%. That’s a tangible difference that directly hits their bottom line.
Then there’s the feed throat, a part almost no one thinks about, but it’s critical. The feed throat is where the raw PET pellets sit before entering the barrel, and if it gets too hot, the pellets will start to melt in the throat, clump, and jam the feed mechanism. We always recommend installing a closed-loop cooling system on the feed throat, separate from the barrel’s heating. Keep feed throat temperature between 15–20°C (59–68°F) for PET—cool enough to keep the pellets solid, but not so cold that they absorb too much moisture. Wait, moisture! That’s a whole other temperature-related issue, because PET is hygroscopic—it absorbs moisture from the air, and if you don’t dry it properly before molding, the moisture will boil when it hits the hot barrel, creating bubbles in the part, which are a huge defect. The drying process also relies on temperature: you need to dry PET at 160–170°C (320–338°F) for 4–6 hours, and the drying hopper’s temperature needs to stay consistent too, not just the resin in the barrel. I’ve seen a molder who tried to cut corners by drying PET at a lower temperature for a shorter time, and their parts had tiny bubbles that made them look like they had air gaps—they had to scrap 20% of their first run before we walked them through proper drying temperatures.
Let’s talk about common mistakes we see all the time, because avoiding these is half the battle. First, not calibrating temperature sensors regularly. The thermocouples that measure barrel and mold temperature drift over time—usually 2–3°C a year, sometimes more if they get exposed to harsh resin or debris. If you don’t calibrate them every quarter, your settings are off, even if you think you have them right. Second, ignoring heat loss through the barrel’s hopper adapter or the nozzle’s sprue bushing. A lot of molders use cheap thermally insulated tape to wrap these areas, which helps keep temperature consistent, but if you skip it, you can lose 5–10°C of heat at those critical points. Third, running the machine idle with the barrel heated up for too long. If you stop production for more than 30 minutes, keep the barrel temperature down to 200°C (392°F) instead of leaving it at processing temp. That prevents the resin from staying in the barrel too long and degrading, which saves both material and downtime when you restart.
For anyone who’s new to PET injection molding, here’s a quick step-by-step routine we share with every customer when they first get their machine: Start by checking and calibrating all temperature sensors (barrel, mold, feed throat, dryer) before the first run. Set the barrel zones to 220°C (feed), 245°C (middle), 255°C (nozzle). Set mold temperature to 15°C, core to 12°C, feed throat to 18°C, and dryer to 165°C for 5 hours. Run a few test shots, measure melt temperature with a pyrometer, and adjust the middle barrel zone by ±5°C if needed to keep melt temp between 250–255°C. Check the first few parts for short shots, streaks, or warping, and tweak mold water flow if you see uneven cooling. Do this first run, and you’ll avoid 90% of the temperature-related issues that new molders run into.
Now, if you’re struggling with temperature control on your current machine, it could be a sign that your setup is outdated, or that you’re using generic settings that don’t account for your specific application. We design our PET injection molding machines specifically to solve these exact problems: our barrel zones have independent, fast-response heating to eliminate temperature swings, our mold cooling lines are precision-machined to ensure uniform flow, and our integrated chillers adjust automatically to ambient conditions. We also provide 24/7 tech support for every customer, so if you call us at 2 a.m. when you’re in the middle of a production run and your temperature is spiking, we’ll walk you through how to fix it right away.
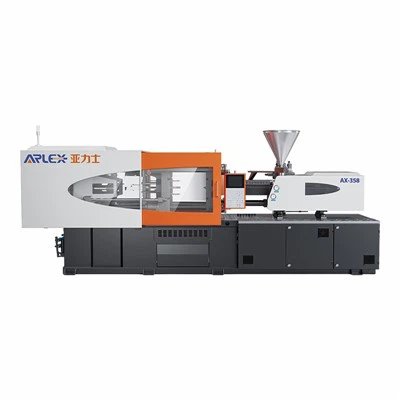
At the end of the day, controlling temperature in PET injection molding is about being intentional, not just following a set of numbers. It’s about paying attention to how every part of the system works together: barrel zones, screw heat, mold cooling, feed throat, drying. Too many people treat it like a set-it-and-forget-it task, but the best molders I know tweak their temperature settings every week based on ambient humidity, material batches, and part types. If you’re tired of dealing with rejects, inconsistent parts, or downtime caused by temperature issues, we can help. We don’t just sell machines—we work with you to optimize your process, so you get the parts you need, when you need them, with minimal waste. If you’re ready to talk about upgrading your equipment or getting a second opinion on your current temperature settings, reach out to our team to schedule a consultation. We’ll come to your facility, run tests, and help you get your process dialed in, no strings attached.
Injection Molding Auxiliary Equipment References
- Rosato, D. V., & Rosato, M. G. (2000). Injection Molding Handbook (3rd ed.). Kluwer Academic Publishers.
- Harper, C. A. (2002). Handbook of Plastics, Elastomers, and Composites (4th ed.). McGraw-Hill.
- Gilbert, M., & Nogueira, R. (2019). Temperature Control in PET Processing: Key Factors for Part Quality. Journal of Polymer Processing Technology, 7(2), 45–52.
- ASTM D4065-21, Standard Practice for Plastics – Dynamic Mechanical Properties: Determination and Report of Procedures. American Society for Testing and Materials.
Ningbo Yalishi (Arlex) Plastic Machinery Co., Ltd.
Address: No.63, Huangsu East Road, Industrial Zone, Dongqian Lake Tourist Resort, Ningbo, Zhejiang Province
E-mail: leo@arlex.cn
WebSite: https://www.arleximm.com/
